Publishing online content looks like an easy piece of cake, meaning anyone can do it. Thanks to the multiple CMS (Content Management Systems) available, printing content online has become so comfortable and convenient. Mostly, everyone is familiar with the most popular CMS like WordPress, Joomla, and Drupal. These are powerful and come with exciting features.
However, did you know, several other CMS systems offer amazing built-in features, better than the popular ones?
Anchor CMS is one of the perfect inclusions in the list. It is an open-source blogging system packed with lightweight features, majorly, designed to focus on writing art-directed blogs. It is a simple, yet powerful content management system. One of the most admirable features of Anchor is its slick admin interface and elegance.
It comes with added features like easy installation, the ability to add custom CSS, JavaScript, HTML code and drag and drop functionality. It also provides a native markdown WYSIWYG support and is SEO-friendly too. Furthermore, unlike other CMS platforms, Anchor CMS is and will always be 100% free of charge for everyone. This is a perfect platform for people who just want to write descriptive blogs and pour out the author within them.
The following are some features enhancing Anchor CMS’s appeal.
- You can write using Markdown, HTML, or whatever language you prefer.
- Add every article amazingly with custom CSS, JavaScript, and HTML.
- A simple theme
- It weighs less than any standard JPG image.
- Drag and drop custom CSS, JavaScript, etc. to your post
- Add or remove infinite custom fields
- easy to install
- and supported by all the latest browsers
This article will educate you on how to install Anchor CMS on the Ubuntu 18.04 server.
Before you Begin
Before you commence installing Anchor CMS, you need to be a non-root user with sudo privileges and a server running Ubuntu 18.04
How to install Anchor CMS on Ubuntu server
The following steps will help you in installing Anchor CMS on Ubuntu.
Step #1: Installing on Apache2 on Ubuntu
Anchor CMS requires a server to run. It is written in PHP and requires MariaDB for data storage. So, you’ll have to install the LAMP server components.
First, install Apache2 HTTP on the Ubuntu server by using:
sudo apt update
sudo apt install apache2
Once the Apache2 installation is complete, you need to enable, start, and stop the Apache2 service from always working when the server boots. Use commands,
sudo systemctl stop apache2.service
sudo systemctl start apache2.service
sudo systemctl enable apache2.service
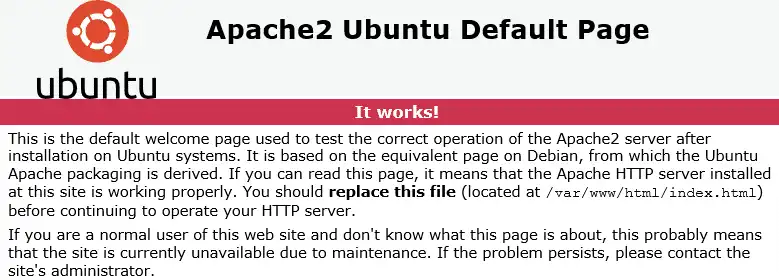
To test its efficiency of working, open your browser, and open the server hostname or IP address. You’ll be able to see the Apache2 default test page as shown below.
Step #2: Installing MariaDB
Anchor CMS also requires a database server to function. MariaDB is the best database server and a great place to start too. Run the following commands to install MariaDB,
sudo apt-get install mariadb-server mariadb-client
After installing MariaDB is complete, you need to be able to stop start, and enable MariaDB server every time your server starts up and reboots. Run the following commands:
sudo systemctl stop mariadb.service
sudo systemctl start mariadb.service
sudo systemctl enable mariadb.service
Next, you need to secure the MariaDB server connection by creating a root password and disabling remote root access.
sudo mysql_secure_installation You’ll be provided with some questions. Answer them, in the following manner, when prompted:
Enter current password for root (enter for none): Just press the Enter
Set root password? [Y/n]: Y
New password: Enter password
Re-enter new password: Repeat password
Remove anonymous users? [Y/n]: Y
Disallow root login remotely? [Y/n]: Y
Remove test database and access to it? [Y/n]:  Y
Reload privilege tables now? [Y/n]:  Y
Now, restart the MariaDB server. Use the command:
sudo systemctl restart mariadb.service
STEP-3 Installing PHP7.1 and other related modules
Since PHP7.1 is not available in Ubuntu default repositories for some systems, you might have to install it from third-party repositories.
Run the following commands to add third-party repositories.
sudo apt-get install software-properties-common
sudo add-apt-repository ppa:ondrej/php
Upgrade to PHP7.1. Use command,
sudo apt update
Now, run commands to install PHP7.2 and related modules.
sudo apt install php7.1 libapache2-mod-php7.1 php7.1-common php7.1-mysql php7.1-mcrypt php7.1-mbstring php7.1-xmlrpc php7.1-soap php7.1-gd php7.1-xml php7.1-cli php7.1-curl php7.1-zip
Next, run the commands below to open the PHP default configuration file for Apache2
sudo nano /etc/php/7.1/apache2/php.ini
Make the following changes to your file and then save it.
file_uploads = On
allow_url_fopen = On
memory_limit = 256M
upload_max_filesize = 100M
max_execution_time = 360
date.timezone = America/Chicago
To test PHP7.2 settings with Apache2, create a phpinfo.php file in the Apache2 root directory. Run the following command:
sudo nano /var/www/html/phpinfo.php
Then type the content below and save the file.
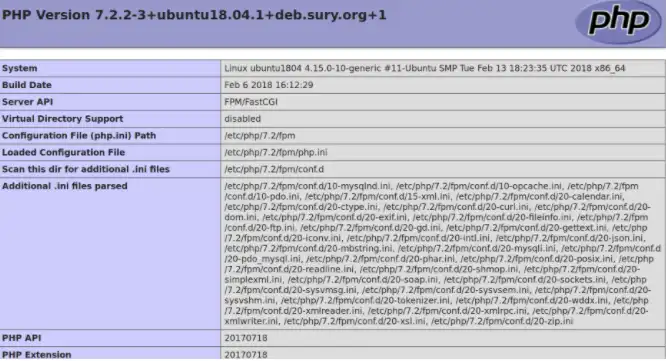
Save the file and browse to its hostname followed by /phpinfo.php You should see the PHP default test page as shown below:
Step #4: Creating Anchor Database
Since you’ve installed all the packages required, you have to configure the servers.
Start with running the below commands to create the Anchor CMS database. When asked for a password, type the one you created in the above steps.
sudo mysql -u root -p
Now, create a database named anchor.
CREATE DATABASE anchor;
Create a database user named anchoruser with a new password
CREATE USER 'anchoruser'@'localhost' IDENTIFIED BY 'new_password_here';
Next, grant the user full access to the database.
GRANT ALL ON anchor.* TO 'anchoruser'@'localhost' IDENTIFIED BY 'user_password_here' WITH GRANT OPTION;
Save all your changes and exit.
FLUSH PRIVILEGES;EXIT;
Step #5: Downloading Anchor Latest Release
Next, you need to visit the Anchor CMS package from their site. Or, you can also run the commands below to install Git, which is required to download the anchor packages from GitHub.
Step #6: Configuring Apache2 Anchor site
The next step is to configure the Apache configuration file for Anchor. The file will control how users access the content. Run the following commands to create a new configuration file called anchor.conf.
sudo nano /etc/apache2/sites-available/anchor.conf
Copy and paste the content below in the file and then save it. Replace the highlighting line with your domain name and directory root location.
     ServerAdmin [email protected]
     DocumentRoot /var/www/html/anchor
     ServerName example.com
     ServerAlias www.example.com

          Options FollowSymlinks
          AllowOverride All
          Require all granted


     ErrorLog ${APACHE_LOG_DIR}/error.log
     CustomLog ${APACHE_LOG_DIR}/access.log combined
Save the file once the editing is completed. Exit the file.
After configuring the VirtualHost, follow the next steps to enable it.
Step #7: Enabling the Anchor site and Rewrite the Module
Enable the VirtualHost by running the following commands.
sudo a2ensite anchor.conf
sudo a2enmod rewrite
Restart the Apache2 server using the command,
sudo systemctl restart apache2.service
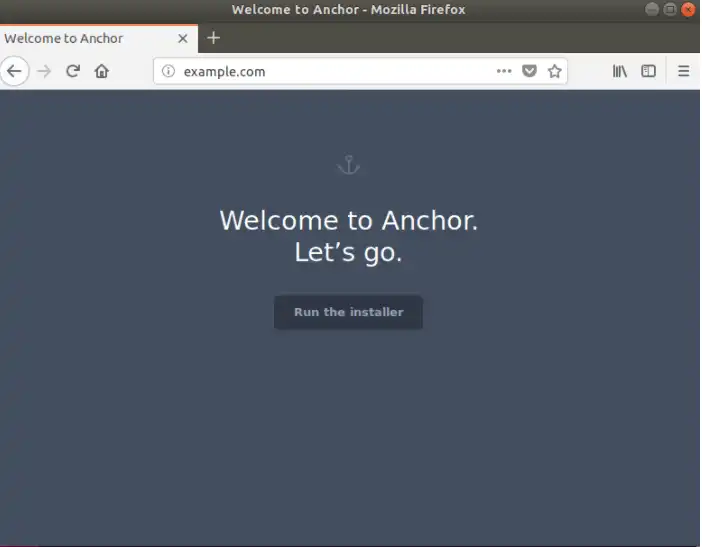
Next, open your browser and browse to the server hostname or IP address. You should see the Anchor setup page.
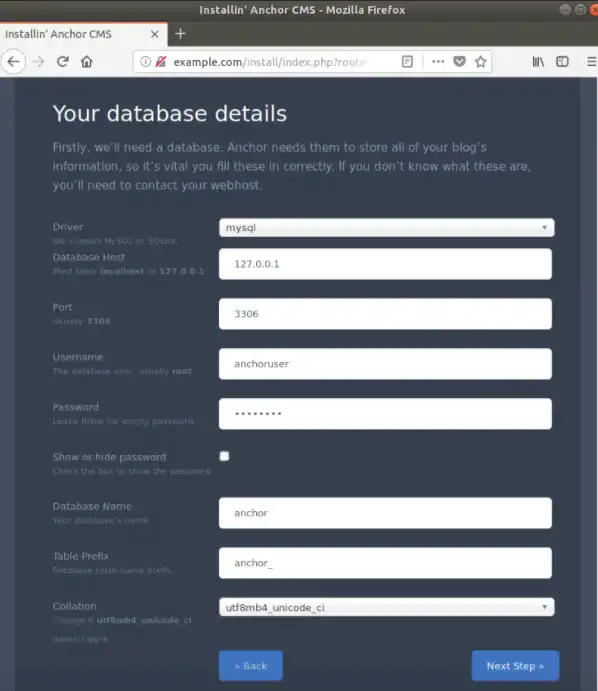
Now, enter the details of your database connection. Anchor will store all your blog’s information so fill them correctly. Contact the web host if you don’t know what they mean.
Next, create an admin account for the backend and complete the installation.
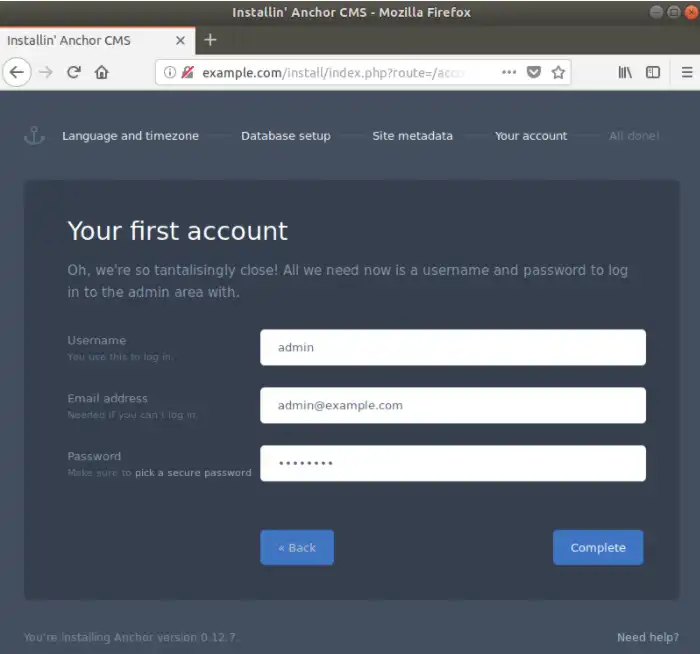
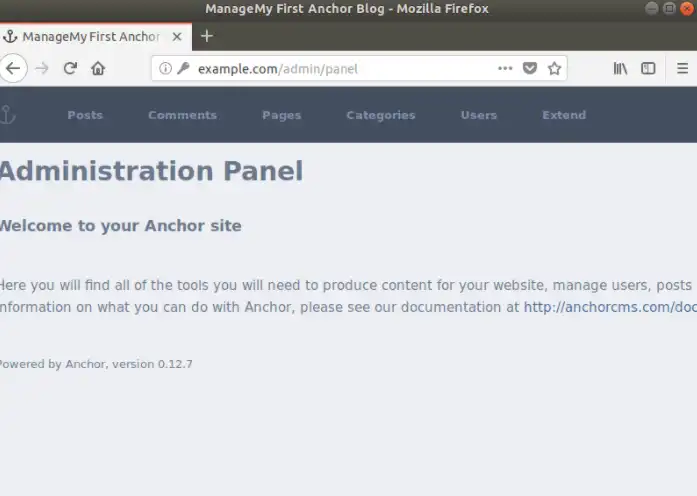
Congratulations, you have successfully installed Anchor CMS on Ubuntu.
Conclusion
Installing Anchor CMS on Ubuntu 18.04 LTS is a straightforward process that allows you to take advantage of its powerful and elegant features. With its focus on writing art-directed blogs, Anchor CMS is an excellent choice for those who want a lightweight, user-friendly platform. By following the steps outlined in this guide, you can set up Anchor CMS on your server, enabling you to create and manage your content with ease.
From installing the necessary LAMP components to configuring Apache and securing your MariaDB installation, each step ensures that your Anchor CMS is set up efficiently and securely. The final steps involve downloading the latest release of Anchor, setting up your virtual host, and completing the installation through the Anchor setup page.
With Anchor CMS now up and running, you’re ready to start crafting your unique and compelling blog posts. Enjoy the simplicity and flexibility of Anchor CMS, and make the most of its features to enhance your online content. Happy blogging!
